
Are you looking for a simple and effective technique for building a subscription form for your email campaigns and landing pages? In this piece we dive headfirst into the Everlytic platform, showing you just how easy it can be. So, let’s get building.
Step 1: Create a Draft Subscription Form
Go to the Subscription Forms dashboard on Everlytic. You can find the link at the bottom of the Contact Manager dropdown.

Next, click on the Create Form button. This will kick off the form building process.
Step 2: Set Your Form Properties
The first thing you’ll see is the Form Properties window. Here you’ll need to input the Form Name and a basic description of the form. At this point you can specify what type of form you want to create. Today that’ll be a subscription form, but you can just as easily create an unsubscribe form using the same interface.

Press the Next button at the bottom right of the screen when you’re done. Now it’s proper form building time!

Step 3: Drag in Basic Data Fields
It’s time to insert basic data fields into your form. Before you start building, be sure you know what you want to accomplish with the data you’re collecting. Everlytic gives you a wide range of field options to choose from, including:
- Basic contact details (name, surname, email, and phone number)
- Personal information (birth date, gender, and marital status)
- Additional contact details (physical address, zip code, office phone number, etc.)
- Company information (company name, department, position, and industry)

Step 4: Add Some Custom Fields
In addition to the standard data fields above, you can add custom fields into your form that will help you to achieve more when collecting data – especially when taking subscriber preferences into account.
The example below features a custom field specifying subscribers’ preferred communication channels, allowing you to adhere to data privacy legislation in your subscription forms.
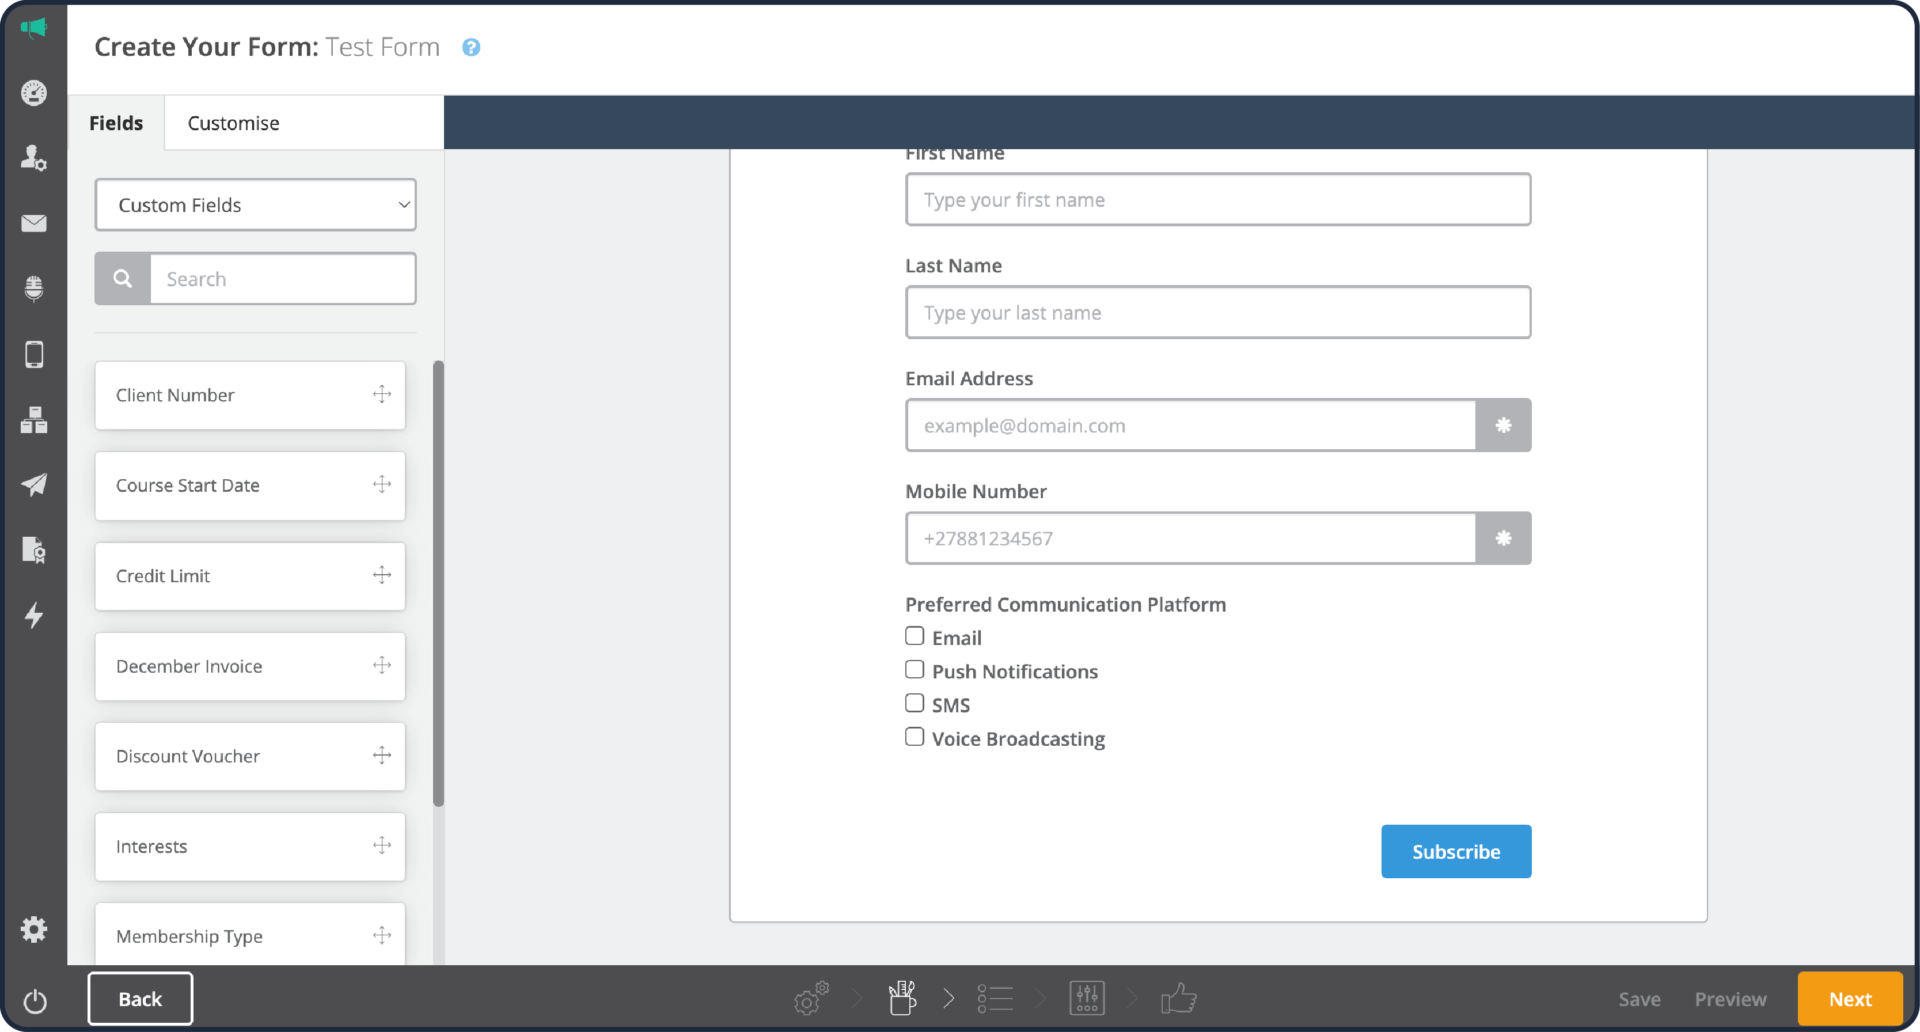
Custom fields have almost limitless applications, and you can get creative when using them to achieve your desired data collection goals.
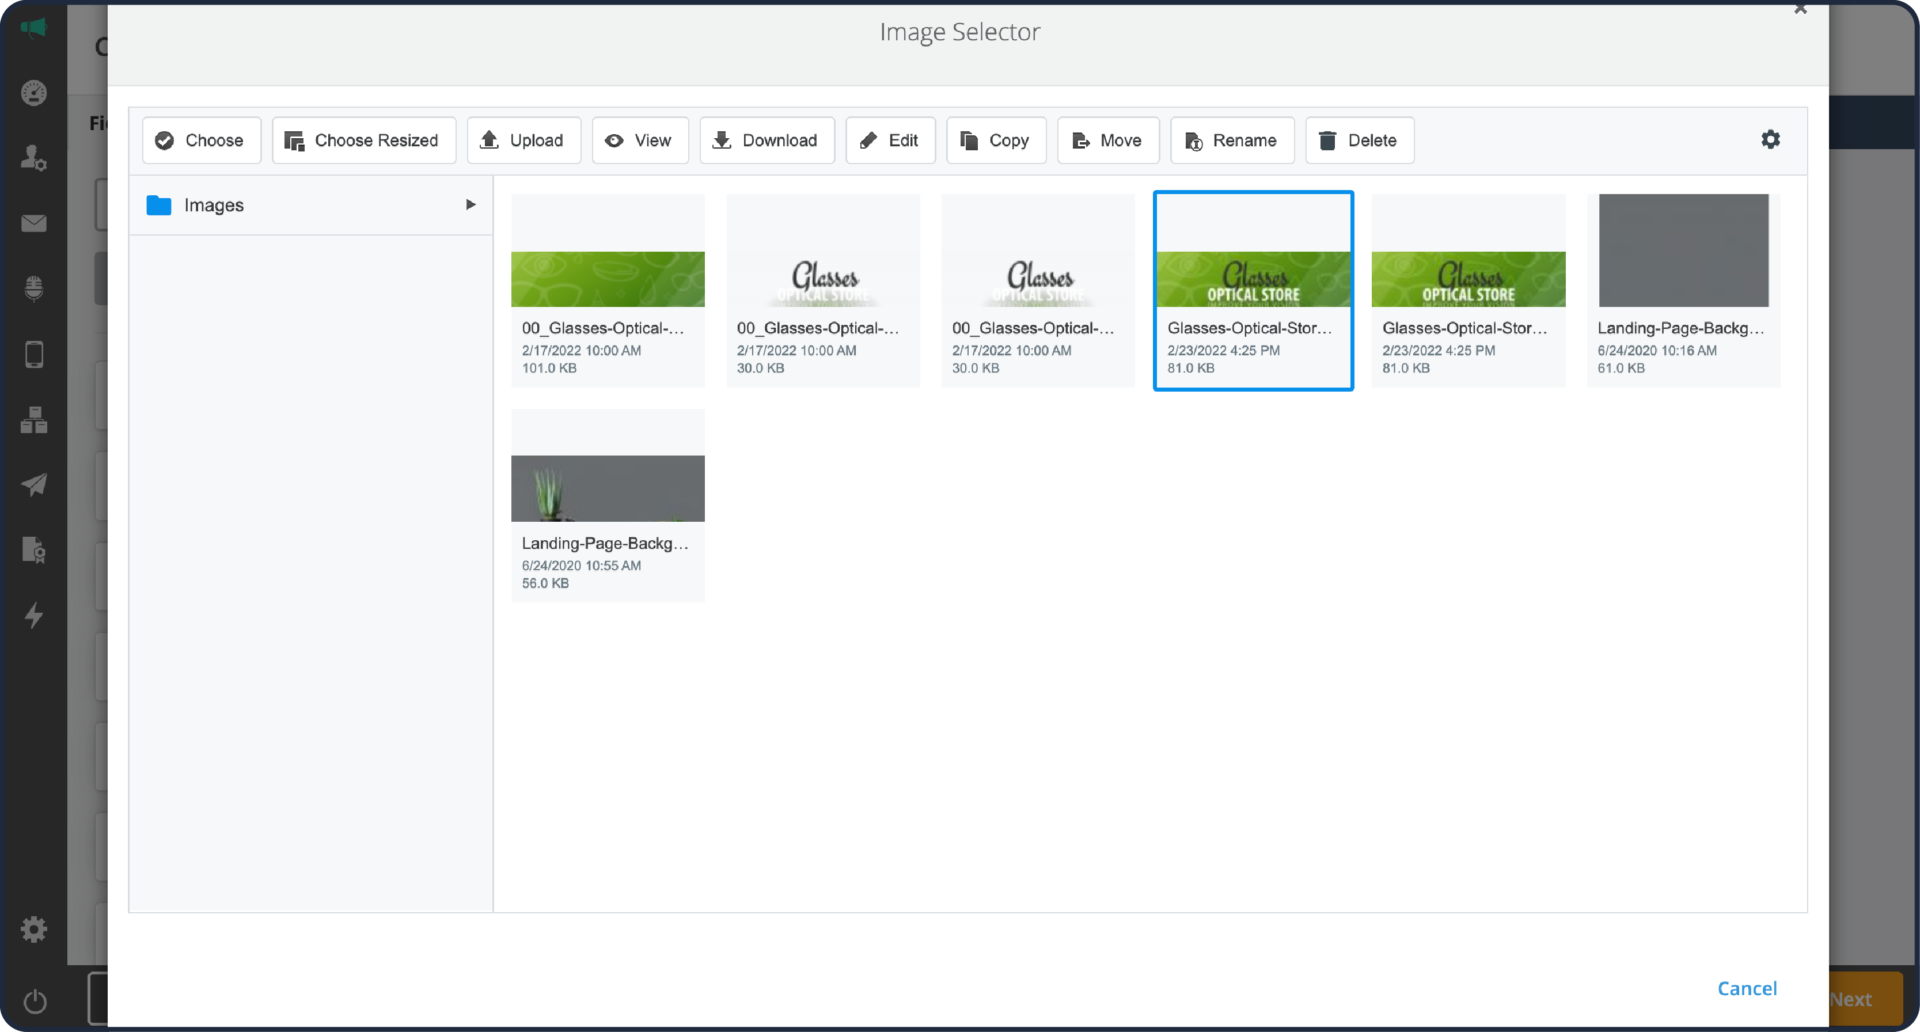
Step 5: Work in Some Creative
Time to make your form attractive to users. Add in custom-designed header imagery by clicking on the plus icon in the header field and uploading your design.
Next, add header copy that speaks to what your form is intended to achieve. If you want people to subscribe to your newsletter, then spell it out clearly in your title (e.g., “Sign Up for Our Newsletter”). Being open and honest about your intentions is not just good for user experience, it’s also a requirement for solid data privacy compliance.

Lastly, style the copy and graphic elements of your subscription form.

Step 6: Select Your Subscription List
The data you’ll be collecting must go somewhere secure, and that’s where this step comes in. Select the list where you’ll be sending subscriber info after they sign up, and then click Next.

Step 7: Set Your Form Options
After you’ve added your list, you’ll be directed to the Form Settings page. By default, this page will open on your form Options. Here you can configure your confirmation email and add CAPTCHA to your form to enhance data security. We highly recommend you select both these options when building a form.

Next, you can specify whether your form should expire on a future date. This is especially useful if you’re using the form in an email campaign that has a definite closing date, submission limit, or both.

The Redirects option allows you to send subscribers to a webpage after submitting or confirming their subscription. This setting can also be used to redirect subscribers when they confirm their subscription in a double-opt-in email.

Lastly, you can set Notifications that get sent to you every time the form is completed by a new subscriber. You can also specify which email address the sign-up notifications get sent to.

After completing your settings, click on the Next button.
Step 8: Confirm & Publish Your Form
At this point, Everlytic will give you an overview of your form properties, as well as the number of contacts and fields currently present in your list. If you’re happy, press the Publish button.

Your form is now complete. Congratulations, you’ve built a fully functional subscription form on Everlytic!

For a stripped-down version of our subscription form building process, have a look at our Knowledge Base update on the topic.
Now there’s only one thing left to do: add it to your digital resource.
If you’re going to use your form in an email, then simply copy the Hosted URL and add it to a button or hyperlink in the desired email.

If you’re planning to use the form on a landing page, then you can export it in four possible ways for addition to your page:
- As a hosted form on Everlytic
- As an iframe
- As an HTML element on your page
- As a JavaScript element on your page

Once your email is sent, or your landing page goes live, then your subscription form is in the real world and doing what it’s designed to do. Now you’ll gradually start collecting data compliantly from interested prospects. Good luck with your data collection efforts!
Optimise Your Digital Communications Today
If you’d like to learn more about the Everlytic platform and its powerful communication tools, then have a look at our dedicated Bulk Communication page.